Fully Encrypted Disk
An intelligent mind once said, "if I can touch your system, then it's not your system." This phrase shaped the way I approached security, and increased my paranoia.
Although many guides exist that describe full disk encryption, they unfortunately fall a bit short of the claim and leave a bit too much unencrypted data available to be tampered with. Fortunately, GRUB2 makes near-full disk encryption very easy, it just takes a few extra steps.
Falling Short
The most common method of full(ish) disk encryption is "Encrypted LVM." This approach, and many others, often use a separate /boot which is used to handle decryption.
When /boot is left unencrypted and secureboot is disabled, an attacker (Evil Maid) is able to edit configuration files (grub.cfg), insert boot options, or replace an entire initrd/initramfs image with one containing malicious code.
Depending on distro of choice, hardware, and BIOS, secureboot might be available. With secure boot, it can be possible to detect changes to initramfs, but this doesn't mean the boot process can't be manipulated via boot parameters or other methods.
Although it's currently imposible to encrypt the MBR, everything else can be encrypted pretty easily. This guide is all about using a single encrypted partitions filling the entire disk.
Installation With Encryption
The process provided here is based on the Debian installer. From the boot menu, choose "Advanced options" and then "Expert installation." Despite the name, this installation method is quite easy, it just provides more flexibility.
This process requires GRUB and generates an MBR that is too large to fit in the standard 512 byte space. Newer partioning tools usually leave a large space before the first partition to accomodate this problem, however, this is largely dependent on the installer. It is much safer to follow a manual partitioning process.
To manually configure the partition table:
Follow the installer through the standard steps
During "Load installer components from CD", select "parted-udeb"
Stop after "Detect disks" completes
Switch to a terminal session (Alt+F2)
Use parted to generate the partition table:
parted -a optimal /dev/sda # or your relevant disk
mklabel msdos
mkpart primary 10M 100%
quit
Switch back to the installer (Alt+F1 or Alt+F7 for graphical)
Once partitioned, the remaining steps will take place from the installer:
- Continue to "Partition disks"
- Choose the "Manual" partitioning option
- If prompted for "Force UEFI installation," choose "No" [1]
- Select the previously created partition
- Change 'Use as' to 'physical volume for encryption'
- Make any other changes you want and select "Done [...]"
- Select 'Configure encrypted volumes'
- Select 'Create encrypted volumes,' select the crypto disk, and finish
- Select the newly created disk (probably sda1_crypt)
- Change 'Use as' to 'physical volume for LVM'
- Select 'Configure the Logical Volume Manager'
- Create a volume group, some volumes, finish, and configure those volumes
[1] This usually means the installer was started in EFI-mode.
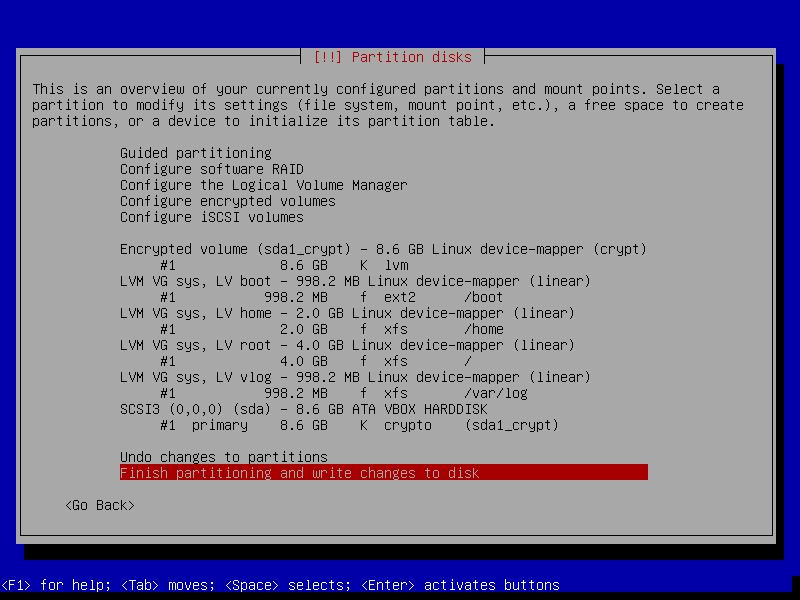
The final result should look similar to this:
Newer versions of cryptsetup will generate encrypted volumes using Version 2 headers. These headers are not currently supported by GRUB and need to be downgraded.
After the step: "Install the GRUB boot loader on a hard disk":
Go to the console (Alt+F2)
Downgrade the LUKS Header:
cryptsetup luksDump /dev/sda1 | grep ^V
# If "Version: 1," then skip the remainder of this step

cryptsetup luksChangeKey --key-slot 0 --pbkdf pbkdf2 /dev/sda1
# Enter the LUKS passphrase three times
cryptsetup convert --type luks1 /dev/sda1
In addition to downgrading the header, GRUB's MBR needs some extra modules:
Start chroot:
mount -t proc none /target/proc
mount -t sysfs none /target/sys
mount -o rbind /run /target/run
chroot /target /bin/bash
Edit grub config (vi /etc/default/grub) and append:
GRUB_ENABLE_CRYPTODISK="y"
GRUB_RELOAD_MODULES="lvm cryptodisk"
Re-run the GRUB installation step:
update-grub
grub-install --recheck /dev/sda
Although not related to disk encryption, this is an excellent opportunity to remove the insanity that SystemD brings with it.
From inside the chroot, swap the init system:
apt install sysvinit-core
apt purge systemd
rm -rf /usr/lib/systemd
Switch back to the installer (Alt+F1)
Finish the installation
Troubleshooting
For reasons I have not yet been able to identify, GRUB installation rarely works with this configuration the first time through. If the newly installed system can't be booted because the MBR can't be found or because "error: disk 'lvmid/xyz' not found," run these steps to fix the problem.
- Boot back into the installer
- Select "Advanced options" -> "Rescue mode"
- Once prompted, provide the LUKS passphrase and mount the root disk
- Switch to a terminal (Alt+F2)
- Manually mount extra partitions
- Return to rescue screen (Alt+F1)
- From "Rescue operations," select "Execute a shell in [...]root
- Select "Reinstall GRUB boot loader"
- Select "Reboot the system"
Decryption During Boot
During boot, the disk will need to be unlocked twice. The first decryption will make /boot available for grub to boot from. The second will be used to mount the root file system and boot. It's important to note that the first password will be entered using the hardware's default keyboard layout; the second will be entered using the OS-configured keyboard layout.
It's possible to embed a decryption key into initramfs so that the key only needs to be entered once, but this has significant security implications and is strongly discouraged. This setup is explained in good detail in Step 4 (Avoiding the extra password prompt) on a Debian cryptsetup page.
Better Security
When GRUB supports LUKSv2, the key will be able to be stored entirely within the kernel, which will prevent a lot of potential security problems. Once this becomes available, it will be worth migrating to.